

Monday, 29 October 2012
LIFE | Stockholm

An empty Facebook wall, complete silence on Twitter, unopened emails and no blog updates. During the last couple of days I have completely disconnected myself from all things digital. For 3 days I haven't been bombarded by hundreds of tweets and thousands of images online, which now I have come to realize are things that clutter and contaminate one's own views and ideas. Instead I was soaking up the unreal reality of Stockholm; breathtaking architecture, inspiring museums, friendly Swedes, constant sunset and the sound of the whirling sea water everywhere. More on that + the places I visited soon!
"Poised and Pretty" In an Custom Stamped Apron
Good Morning Every One - my name is Lynne Mizera and I am tickled pink, green and purple to be posting my first ever project as a Susan K. Weckesser Guest Designer. I have loved every single thing Susan has ever produced since I first came in contact with her amazing line of paper almost three years ago and when I saw the "Poised and Pretty" vintage paper doll stamps I just KNEW I wanted to create something extra special using them and here it is TAAA DAAA.....
A Custom Designed Apron!
 |
| My good friend Christine Modeling the finished apron |
Now... I am an Apron Girl... I have more aprons than I do T-shirts and that is because when I am in the middle of the creative process I just DON'T CARE where I wipe my hands, or clean my brushes or my stamps and it is usually on my clothes... so I started wearing aprons to save my clothes. But at that time aprons had gone out of fashion and the ones I could find were just so basic and ugly I needed to pretty them up - and since I do not sew I began to get creative with my "Apron-wear" and it was then that I discovered that you can color on fabric with Copic markers! Yup AND Shade too! but NOW I have discovered that you can STAMP on fabric also!
 |
| a close up of the details... isn't the shading lovely? |
So I gathered up my tools: a black Memento ink stamp pad; my Unity stamps - I used the Poised and Pretty Vintage Paper Doll stamp created by Susan and if you love them as much as I did you can find them right here on the Unity Stamp website and a second Unity sentiment stamp; my copic markers and a new, unwashed, unbleached cotton apron.

Before you start stamping it is a good idea to look at your apron and decide where you want your design to be. Think about the activities you will be doing in that apron, because it doesn't make sense to spend a lot of time stamping and coloring a beautiful design in the corners of your apron if you use the corners to wipe your brushes! You will notice this apron has a large empty space in the centre because I will be using this one in the kitchen and THAT is where all my food stains end up.

After I had decided where I wanted my images, I stamped my design all over the apron and let it dry for about 10 minutes (knowing me probably less!) At this point if you want to be sure the ink won't run when you start to color you can iron the stamped images on high heat with a dry iron to set the ink into the fabric, but I did not and the ink did not run at all. That's it... then you just color away! I was amazed that the fabric had very similar properties to paper and I could shade and blend and lay down color very much like I do on paper, although the fabric does suck up that ink, and just like paper if you really saturate the area the ink will bleed over the lines... so remember Less Is Better, and layer, layer, layer!
 |
| My first images... I was very tentative with the ink... LOVELY! |
 |
| My Last images.. I was got a little carried away with the ink and you can see the bleeding. |
Lynne Mizera
Guest Designer for Susan K Weckesser, Inc.

Paint the town Red!
My bag has sat alone and unloved in a cupboard for a couple of years.

It had served me well and I still liked the softness of the leather and the size of it too but it was boring.
It was ready for a makeover, a full rejuvenation, for my first Susan K. Weckesser Design Team assignment.
I have not worked with stamps on leather before. Where to start? A bit of pondering and then I saw it! One of the tags from the Susan K.Weckesser Whymsical Paper Collection.

Off I went...... gathering ...... Susan K Weckesser & Unity Stamps

........some Susan K Weckesser Whymsical Range Papers.......


This is the inside flap and here I used the sequin waste stamp from the A Little Bit Washi Set SB-979A. Using Colorburst and Live, Love, Create Paper by Susan K. Weckesser I punched a variety of circles. I had fun cutting a couple of circle stamps of my own and then I went a bit "dotty" with the Viva Decor Pearl Pens.

The inside pockets continued the circle theme, which I have used all the way around the outside edge of the bag. For these I used my favourite, In Circle Me SB-980A to stamp directly onto the leather and also onto alcohol inked, glossy cardstock which was then punched out into circles.
 The bright leaves from Autumn Grunge SB-974A were coloured with stamp pads, stamped first onto tissue paper and then adhered to the bag.
The perfect finishing touch was a second tag, with just a tiny change.

My bag has been transformed in my studio - Time To Create.
I know I am going to love being able to swing it over my shoulder and have a lot more fun times with it.
Of course, I gave it a couple of coats of waterproof spray.
After all ...we just might... ... Paint The Town Red!
Julie - Susan K. Weckesser Design Team Member

It had served me well and I still liked the softness of the leather and the size of it too but it was boring.
It was ready for a makeover, a full rejuvenation, for my first Susan K. Weckesser Design Team assignment.
I have not worked with stamps on leather before. Where to start? A bit of pondering and then I saw it! One of the tags from the Susan K.Weckesser Whymsical Paper Collection.

Off I went...... gathering ...... Susan K Weckesser & Unity Stamps

........some Susan K Weckesser Whymsical Range Papers.......


......and other products to add to the rich colours that are October, no matter where in the world you live. In the Northern Hemisphere it is the richness of Autumn while down here in Australia it is bright flowers and sunshine.


A bag like this offers you many opportunities to play, to experiment and to add lots of colour to personalise it. So that's what I did!

This is the inside flap and here I used the sequin waste stamp from the A Little Bit Washi Set SB-979A. Using Colorburst and Live, Love, Create Paper by Susan K. Weckesser I punched a variety of circles. I had fun cutting a couple of circle stamps of my own and then I went a bit "dotty" with the Viva Decor Pearl Pens.

The inside pockets continued the circle theme, which I have used all the way around the outside edge of the bag. For these I used my favourite, In Circle Me SB-980A to stamp directly onto the leather and also onto alcohol inked, glossy cardstock which was then punched out into circles.

The perfect finishing touch was a second tag, with just a tiny change.

My bag has been transformed in my studio - Time To Create.
I know I am going to love being able to swing it over my shoulder and have a lot more fun times with it.
Of course, I gave it a couple of coats of waterproof spray.
After all ...we just might... ... Paint The Town Red!
Julie - Susan K. Weckesser Design Team Member
Wednesday, 24 October 2012
Everyone is Invited!
I am so excited to invite you to the 4th Annual Christmas Love Campaign! Sorry about the video quality…. I was SO excited to get this out, that I didn’t worry about my camera! It is the {message} that counts, right!?! ;)…. so PLEASE spread the word & invite everyone!
Are you ready?
To make a difference in someone’s life…
and have a little bit of fun at the same time.
Well, then get ready to join in for the 4th Annual Christmas Love Campaign.
P.S. You wouldn’t believe the wonderful Sponsors that are joining into spread some love too!
November 6,2012 ~ January 7,2013.
Find out all the details
---->HERE<----
Get ready to touch some {HEARTS}!
xoxox

DIY | Sporty Bra
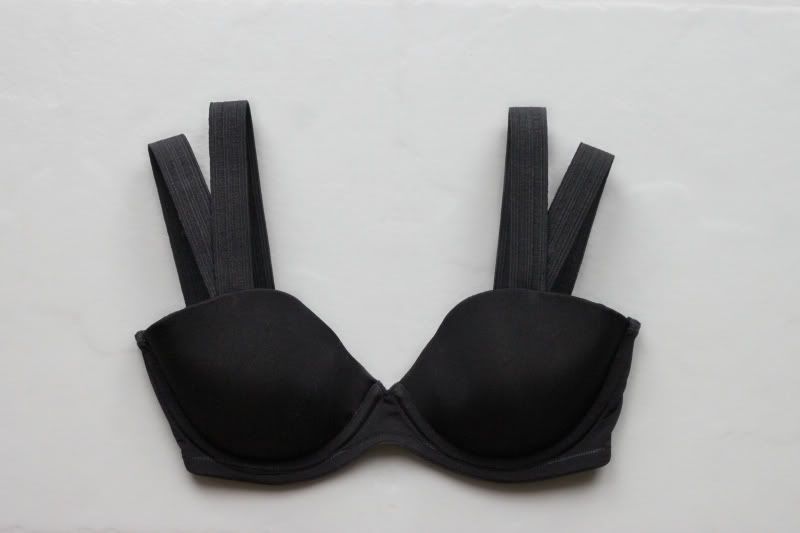
A project I did for NSMBL's DIY section
This DIY is a sequel on the T-strap bra I did a long time ago. Adding a few broad elastics to a strapless bra make it a much more practical piece(=no more pulling your stuff up). And I really don't mind these thick well placed black lines showing underneath a loose knit or sheer top.
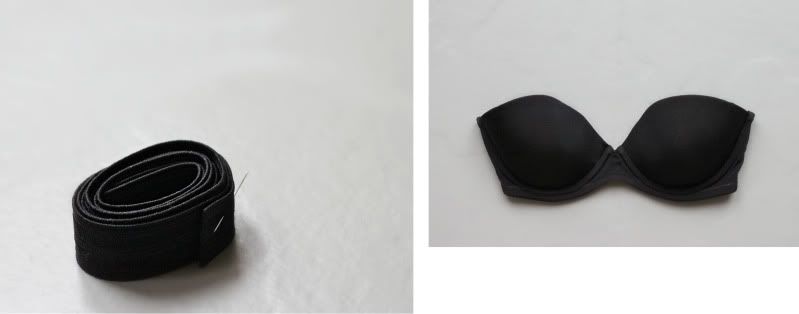
instructions
-strapless bra
-some elastic and
-needle and thread
Decide which shape you want to create with the elastics and measure how long the straps should be. Cut the straps 2 cm shorter than these measurements as this is elastic and you wouldn't want the straps to fit too loosely. Sew on the elastic, most bra's are made out of several layers of fabric, so it is very easy to attach them invisibly.
Monday, 22 October 2012
Create your day with love from the Homefront . . .

Hello everyone!It`s Tracy Easson here today and I am so excited to be sharing my 1st post with you as a member of Susan K Weckesser's first ever Design Team. It`s an honour and such a privilege to be creating alongside some amazingly talented ladies.
Below are the beautiful words of inspiration Susan gave us to spark our imaginations this month:
Autumn is the party dress Mother Nature dons prior to wrapping herself in white blankets for a long winters nap.
I have such happy childhood memories,walking to school all wrapped up snug against the cold nip in the air, rustling through all the pretty jewel-coloured leaves that had fallen from the trees.
Sooo, I gathered together Autumn coloured felt, Scissors, Black Versacraft ink pad, Bondaweb and the stamps I fell in love with Unity & Susan K Weckesser Create your Day stamp set

Next I came up with a plan and thought you might like a peek

Now the fun part stamping and cutting . . .

Using Bondaweb is so easy; cut it to size, pop on the back of the shapes, cover with a damp cloth and then, with your iron on a moderate heat and the no steam setting, press gently for about 10 seconds and allow to cool.

I stamped the house twice so that it could be pieced together.

I added a few of my wonky tonky stitches to give it a little touch of whimsy and then mounted it onto another square of felt.

Still needed that little something to finish it off so rooted around my stash and came up with these little seed beads, scattered and fixed in place with Glossy Accents.
So what have you made I can hear you cry?
Well I can tell you that the fabric box once held a candle and now it houses . . . .nooo sorry I can`t tell you yet because this is my first gift to share for Susan`s Christmas Love Campaign and I want what's inside to be a surprise, but have taken more pictures to share at a later date, promise!
This campaign is so heartfelt and filled with love that
I hope you will join us in sharing too.
I hope you will join us in sharing too.
Till next time
Happy Crafting
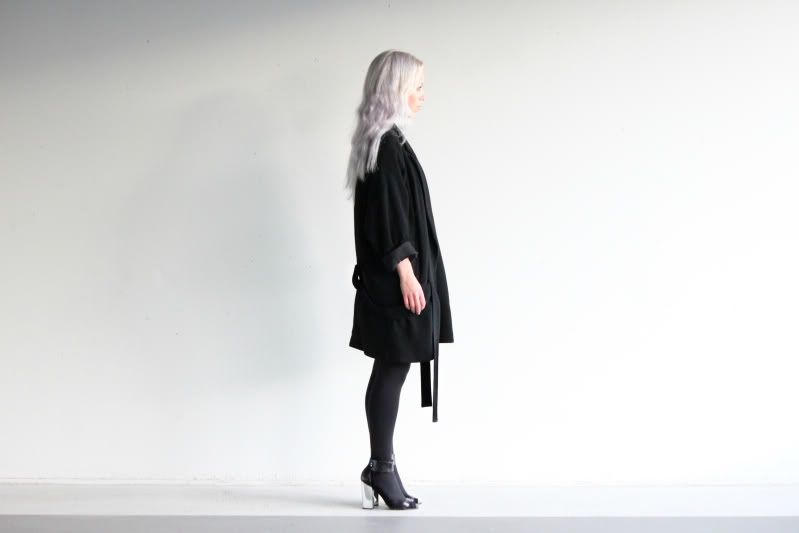
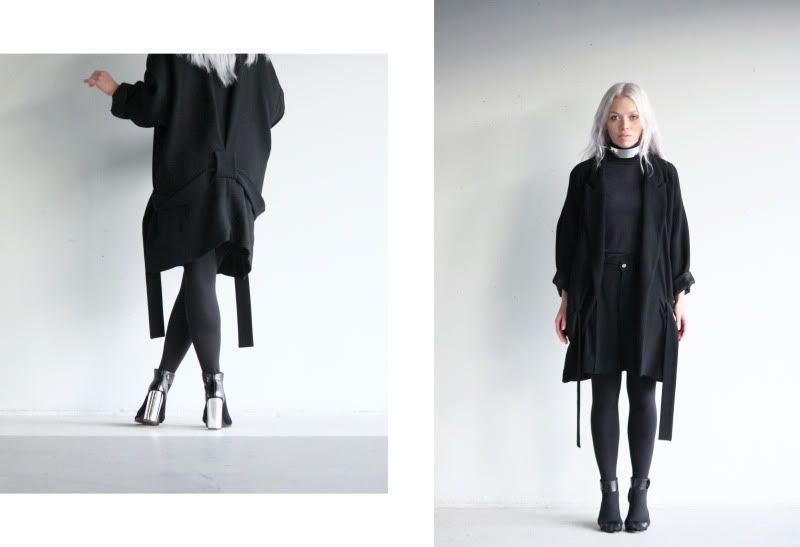
OUTFITS | Mesh Skirt
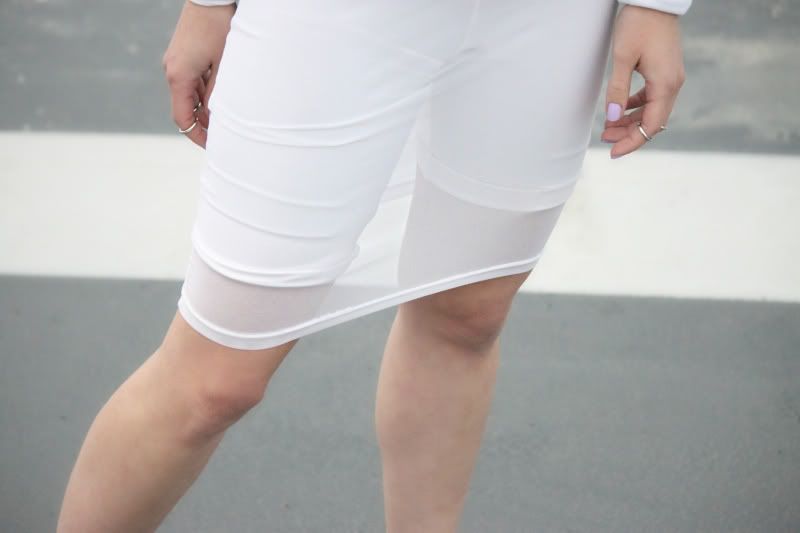
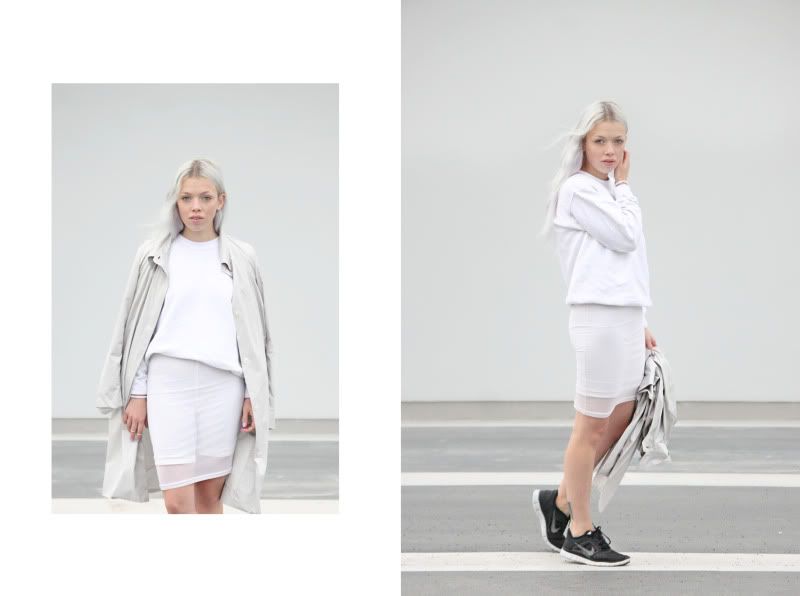
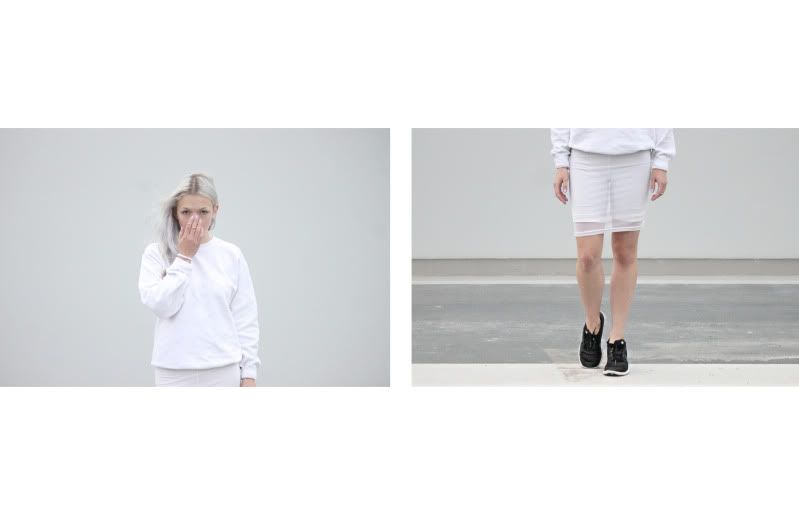
sweatshirt: American Apparel
mesh skirt: micromesh dress American Apparel
shorts: cut off vintage leggings
coat: Land
trainers: Nike
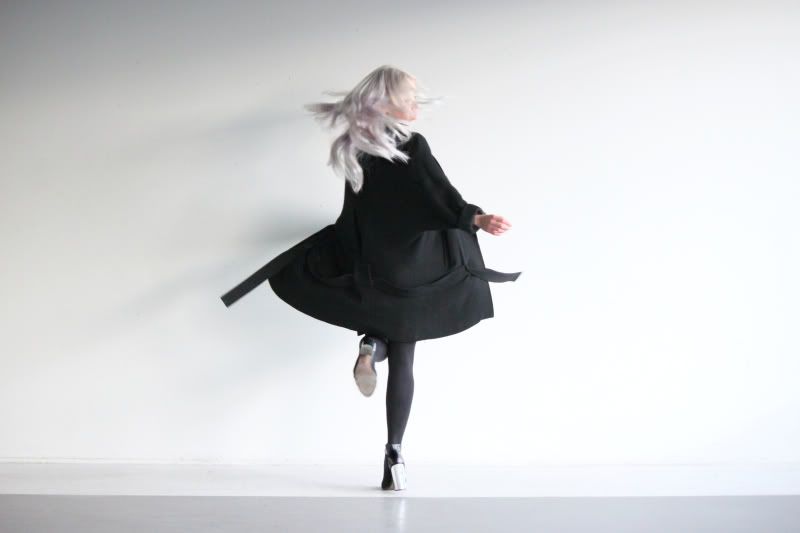
"No I'm not cold" A line I had to repeat quite a few times yesterday. (How badass right?) But honestly, it wasn't that warm either.
Swore to myself that this is really the last time I'm going out bare legged this year, come on Ivania, it's almost November!
Sunday, 21 October 2012
Mixed Media Blast with Susan at the Great Canadian Scrapbook Carnival
![IMG_0358[1]](https://blogger.googleusercontent.com/img/b/R29vZ2xl/AVvXsEjxKGnCn54QmBOg_tHTrvjC9zhsn-sjlscNoY5u5C7xubsbRiXrs5B0EyyCizsP24bDQzP4c53ItOjQmNI0hSE8ZWC4ImX8KougHDrqrL_A6TLNsb19-nte836bMyyh2ZR7MkbEQl-MIYY/s1600-h/IMG_0358%25255B1%25255D%25255B16%25255D.jpg "IMG_0358[1]") This is the very first time I had my youngest daughter , Jessica, come with me to an event, so I was excited when she got up early and jumped in the car with me to head off to Calgary for the Great Canadian Scrapbook Carnival!
This is the very first time I had my youngest daughter , Jessica, come with me to an event, so I was excited when she got up early and jumped in the car with me to head off to Calgary for the Great Canadian Scrapbook Carnival!![IMG_0346[1]](https://blogger.googleusercontent.com/img/b/R29vZ2xl/AVvXsEiVTB_CFWwc9Ozgh6U8puWd9Ox-lq8MT_oAmJpyuf1uUGl0eueWMa5k_9UpTETFrWiBRZHtqf0Enjo-f1lD2uoBV2nakRuapCinlLdtWeWCpcPm-I1hd1hIUgnMXEah_HoRt8YrWiyA3gs/s1600-h/IMG_0346%25255B1%25255D%25255B9%25255D.jpg "IMG_0346[1]") Jessica was taking some pictures with my phone and as you can tell, we left sunshine and drove into yucky, snowy, cloudy, horrible road conditions. (Have I ever mentioned that I get lost, well, I get LOST …plus I am not good in BIG cities especially in BAD road conditions!) We made it there after being LOST 15 times! My husband gave me directions but to my defence he wrote down roads that didn’t even exist! Oy!
Jessica was taking some pictures with my phone and as you can tell, we left sunshine and drove into yucky, snowy, cloudy, horrible road conditions. (Have I ever mentioned that I get lost, well, I get LOST …plus I am not good in BIG cities especially in BAD road conditions!) We made it there after being LOST 15 times! My husband gave me directions but to my defence he wrote down roads that didn’t even exist! Oy!The Show was AWESOME! Lots to look at, see and do!
My CLASS was SO MUCH FUN!!!! The ladies who took my class were FANTASTIC!!!!! It was a 2 hour class, but it was such a technique packed class that we actually needed another hour to finish. I guess it doesn’t help that I LOVE to tell little stories and share lots of tid bits of information along the way!
Here are some pictures from the class!
 Aren’t these two gals so cute! I adored how they weren’t afraid to get COLORFUL! Actually, no was afraid to get colorful…with was great!
In this mixed Media class we used Heidi Swapp’s Memory Albums, my Susan K. Weckesser Inc Paper Line and Unity Stamps and learned how to take different color mediums and layer them up to get different effects! Totally COOL!

We also learnt the blending wonders of Faber-Castell’s Gelatos. The colors match up so well and they are so easy to work with!
 We learnt how products can be layered on top of each other to achieve different effects, be it Heidi Swapp’s Color Shine, Clear Snap’s Mixed Media Ink, or Faber-Castell Gelatos.

 We learnt how products can be layered on top of each other to achieve different effects, be it Heidi Swapp’s Color Shine, Clear Snap’s Mixed Media Ink, or Faber-Castell Gelatos.
 It was so AWESOME to see how everybody’s creation was SO individual and unique! Everything looked so COLOFUL & BEAUTIFUL!


 I have to admit to….it put a smile on my heart to see people create with beautiful colors and to use my Live in Color paper and Co-Branded Susan K. Weckesser/ Unity Stamp Co. Stamps too! This class was so much fun!!!
What A WONDERFUL & colorful mess!!! I LOVE it!
Thank-you to everyone that came out and shared this afternoon with me. Especially thank-you to my daughter Jessica for helping me enjoying the ride with me!
As we drove home last night through the yucky weather, the skies cleared for a moment, and right in front of us a bright shooting start fell for what seemed like minutes…. we where listening to the song, The Shooting Star! It was a perfect ending to our day!
A BIG, HUGE, thank-you to the following companies for sending out beautiful product so we could all COLORFUL at the 2012 Great Canadian Scrapbook Carnival.


